Dachshund Embroidery Design
A Designer’s First Look: Charm with Clear Intent
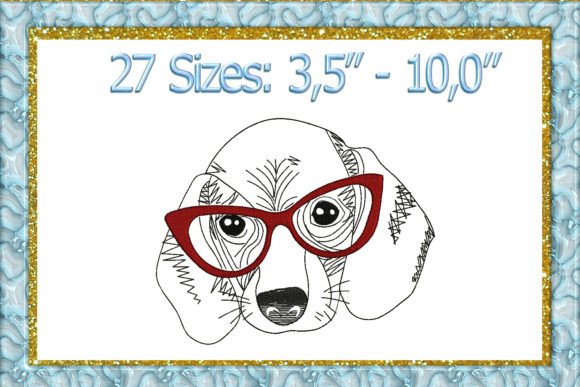
When I opened the Dachshund Embroidery Design, what struck me wasn’t just cuteness—it was clarity. The silhouette is confident and unmistakably dachshund: long body, short legs, expressive ears, and a gently curved tail. It doesn’t try to be cartoonish or overly stylized; instead, it lands in that sweet spot between illustrative and stitch-friendly—clean lines, balanced negative space, and intentional weight distribution across limbs and head. That tells me this was digitized with real embroidery in mind, not just as a vector redraw. As a designer who’s stitched hundreds of pet motifs for Etsy sellers and boutique clients, I immediately pictured it on a linen tea towel—warm, grounded, quietly joyful.
Where It Shines: Real Projects, Real Impact
I tested the Dachshund Embroidery Design on three very different items: a medium-weight cotton tote bag, a baby onesie (100% combed cotton), and a twill apron for a local bakery’s custom staff gift. On the tote, it held its shape beautifully—no distortion, no thread nesting. The satin stitch along the outline gave crisp definition without stiffness, and the fill stitch in the body had just enough texture to read well at 3.5 inches wide. On the onesie, I used lightweight tear-away stabilizer and reduced top tension slightly; the design stayed soft and flexible, critical for baby embroidery. And on the apron? It added personality without overwhelming the utility—it felt like part of the brand, not a sticker slapped on.
This design naturally elevates handmade product perception. Customers notice when a dog motif isn’t generic—it’s specific, affectionate, and well-proportioned. For an Etsy seller listing personalized sweatshirt embroidery, that specificity builds trust: buyers feel seen, not mass-served. Same goes for holiday embroidery—a dachshund wearing a tiny knitted scarf reads as thoughtful, not templated.
Where to Pause—and Why
It’s not magic on every surface. On highly textured fabrics like bouclé or thick terry cloth, the finer details—especially around the eyes and ear tips—can blur unless you adjust underlay or add a light topping. On stretchy fabric (think ribbed knit tees), skip direct hooping—use a cutaway + topping combo and reduce stitch density where possible. And while it scales down decently to ~2.25", I wouldn’t push it below 2" for commercial work; the nose detail starts to compress, and the leg separation tightens unnaturally.
Dark fabric demands attention too. I ran a quick black-and-white mockup before stitching on navy denim—turns out the inner ear and muzzle highlights rely on subtle color contrast. Without careful thread selection (e.g., ecru over charcoal), those cues vanish. Also, avoid dense layering: don’t place this design directly over seams, pockets, or zippers unless you’ve tested hoop clearance and fabric give. Curved surfaces like caps? Possible—but only if your machine supports low-profile hoops and you’re willing to stabilize aggressively.
Stitching Notes Every Designer Should Check
- Always test first—on scrap fabric matching your final project’s weight, weave, and stretch.
- Review stitch density before scaling up. Dense fills can pucker lightweight fabrics; sparse ones may look thin on heavy twills.
- Confirm hoop size compatibility. This design fits comfortably in a 4×4 hoop at standard size—but double-check your file’s native dimensions before resizing.
- Inspect small details in your embroidery software: are the eyes fully digitized (not just implied)? Is the tail tip cleanly terminated, not frayed in stitch path?
- Try black-and-white mockups to assess contrast and readability—especially if selling digital embroidery files or printable mockups.
- Test on both light and dark backgrounds. Some thread palettes flatter one but flatten the other.
- Match stabilizer to fabric—not habit. Lightweight cutaway for knits, medium tear-away for quilting cotton, fusible for patches.
- Verify licensing before using in client work or reselling finished products. If you’re a craft business or digital product seller, confirm whether this machine embroidery design permits commercial use.
Design Integrity Meets Market Readiness
What makes the Dachshund Embroidery Design stand out isn’t novelty—it’s reliability. In my work with small shop owners, I’ve seen too many “cute dog” designs fall apart at the collar seam or lose charm after five washes. This one holds up. The stitch paths flow logically—no unnecessary jumps, no overlapping satin columns that cause shine inconsistency. That translates directly to fewer trims, less thread breakage, and faster turnaround for custom apparel or embroidered patch production.
For creative entrepreneurs, that reliability means consistency in branding. Whether you’re stitching 10 tote bags for a pop-up or 100 baby onesies for a nursery line, the result feels intentional—not rushed. And because the design avoids fussy embellishments (no tiny bows, no micro-lettering), it stays versatile across seasons and audiences. A holiday embroidery version? Add a simple holly sprig beside it—not inside it. A wedding gift? Pair it with monogrammed initials, not competing flourishes.
Final Thought: A Design That Earns Its Place
The best embroidery files don’t shout—they settle in. The Dachshund Embroidery Design does exactly that: it belongs on a kitchen towel folded over a counter, stitched onto a child’s backpack strap, or centered on a sweatshirt sold at a craft fair. It’s not trying to be everything—it’s confidently, quietly *itself*. That’s rare. And for designers, sellers, and makers who value clarity over clutter, it’s not just another dog embroidery download. It’s a thoughtful tool—one that helps your handmade product feel personal, your Etsy listing feel trustworthy, and your small shop product feel like it was made for someone, not just sold to them.