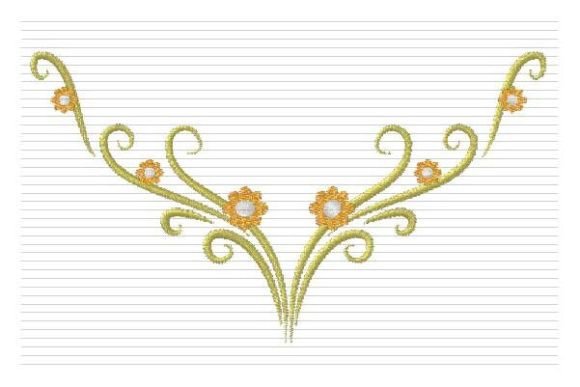
Border Embroidery Corner
A Designer’s First Look: Graceful, Grounded, and Purpose-Built
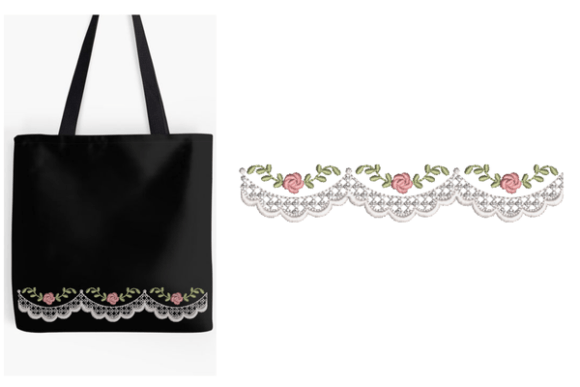
When I opened Border Embroidery Corner for the first time, what struck me wasn’t just symmetry—it was intention. This isn’t a filler motif or a scaled-down border repurposed awkwardly for corners. It’s designed *for the corner*: balanced weight, clear visual anchors at each point, and a rhythm that draws the eye inward—not out, not away. The shape feels like a quiet nod to tradition (think vintage tea towels or heirloom baby blankets), but with clean lines that hold up beautifully on modern sweatshirts and minimalist tote bags. It leans gentle rather than ornate—no fussy scrolls or overwrought flourishes—so it supports the item it’s on instead of competing with it.
How It Lands in Real Projects: From Sketch to Stitched Reality
Last week, I used Border Embroidery Corner on a set of linen kitchen towels for a local boutique. We placed one in each corner of the towel’s hemmed edge—subtle, cohesive, and instantly elevating. Customers didn’t say “Oh, nice corner design.” They said, “This feels handmade *and* intentional.” That’s the quiet power of a well-executed corner motif: it signals care without shouting. I’ve also tested it on baby onesies (centered on the chest pocket corner), custom aprons (top-left corner above the pocket), and even as framing elements for embroidered patches meant for denim jackets. In every case, it behaved predictably—no distortion, no stitch pile-up, no lost detail—even on medium-weight cotton twill with light tear-away stabilizer.
Where It Shines—and Where to Pause
Border Embroidery Corner excels in projects where refinement matters more than flash: personalized gifts, boutique merchandise, nursery decor, wedding guest towels, and small-batch apparel. It reads as thoughtful—not trendy—so it stays relevant across seasons. For Etsy sellers, it adds perceived value without raising production complexity. As a machine embroidery design, it stitches cleanly on stable fabrics like quilting cotton, canvas, terry cloth, and midweight knits—especially when paired with appropriate stabilizer.
That said, I’d proceed carefully on highly textured fabrics (like bouclé or heavy terry loops), where fine satin stitch edges might snag or blur. On very thin or delicate fabric—say, silk charmeuse or lightweight rayon—I’d test stitch density first; dense fill areas could cause puckering. Stretchy fabrics (like jersey) need proper cutaway stabilizer and possibly reduced density—Border Embroidery Corner doesn’t include built-in stretch compensation, so that’s on you. And on curved surfaces—caps, hats, or tapered pillow corners—I recommend digitizing a slight curve adjustment or using it only on flatter zones (e.g., the front corner of a structured cap visor).
Stitching Clarity Meets Customer Trust
What makes Border Embroidery Corner work commercially isn’t just aesthetics—it’s legibility. Even at modest sizes (approx. 2.5"–3.5" wide per corner), key elements—like the outer frame line, inner motif, and connecting curves—remain distinct after stitching. That clarity builds customer trust: when buyers see crisp, consistent corners on your embroidered tote bag or holiday pillow cover, they assume the same care went into construction, thread selection, and finishing. It reinforces professionalism, especially for craft businesses selling premium handmade products. No one mistakes this for a rushed digital embroidery file slapped onto fabric.
Practical Designer Notes You’ll Actually Use
- Always test on scrap fabric first—especially if switching from cotton to knit or dark to light backgrounds.
- Check thread color contrast: a soft pastel on ivory linen reads differently than navy on charcoal cotton. Try both in your printable mockup.
- Review stitch density: high-density fill areas may require lighter stabilizer on delicate items—or heavier backing on thick towels.
- Confirm hoop size compatibility: corner designs can push toward hoop edges; make sure your machine’s throat space accommodates placement.
- Inspect small details under magnification—tiny loops or narrow satin stitch returns should hold up after washing.
- Test black-and-white mockups: helps spot tonal flattening on busy fabrics or low-contrast thread combos.
- Use proper stabilizer: medium-weight cutaway for knits, tear-away for stable wovens, fusible for lightweight layers.
- Verify licensing: if selling finished products or bundling Border Embroidery Corner as part of a digital embroidery file pack, confirm commercial use rights upfront.
Final Thought: A Cornerstone, Not Just a Corner
I don’t reach for Border Embroidery Corner when I need something loud or experimental. I reach for it when I want to close a loop—literally and figuratively. It finishes a project with quiet confidence. Whether you’re an Etsy seller building a signature look, a small shop owner curating holiday embroidery, or a designer prepping a client’s custom apparel line, this corner motif delivers consistency without compromise. It doesn’t distract. It doesn’t overwhelm. It simply belongs—wherever a thoughtful, symmetrical, hand-finished touch is needed. And in today’s market, where handmade presentation and brand cohesion matter more than ever, that kind of reliability isn’t just useful. It’s essential.